
Author name: edrishyam

Motion Capture Animation
Blog

Motion Capture 101: How Actors Become Digital Characters

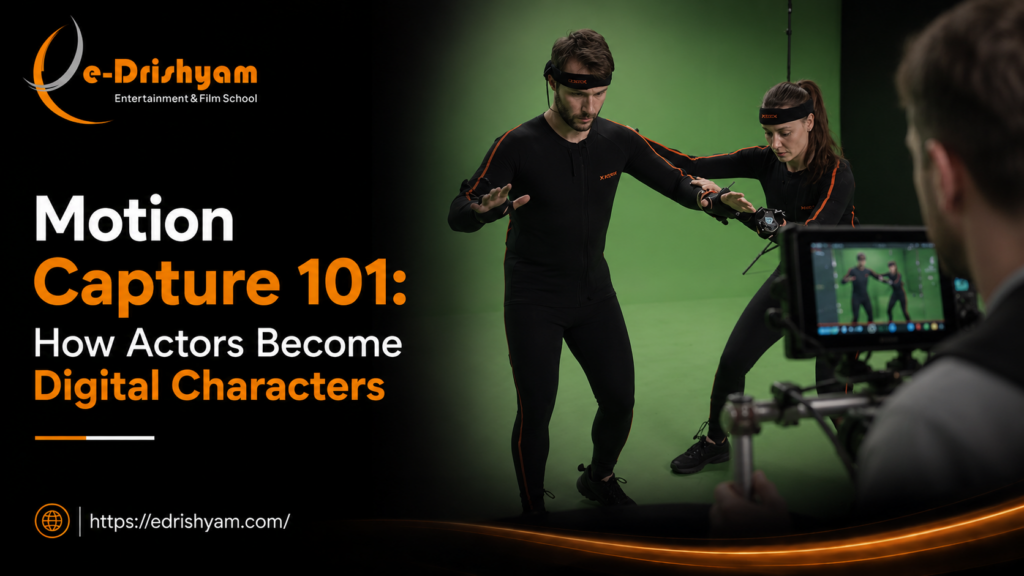
Some of the most unforgettable characters in modern cinema were never physically on set. The towering Na’vi in Avatar, the expressive apes in Planet of the Apes, and many creatures in blockbuster films all began with a real actor performing in a specially designed motion capture suit. Every expression, gesture, and movement was first performed by a human before being captured as a digital character. This process, known as motion capture animation, has transformed the entertainment industry. It lets filmmakers and game developers to create realistic performances while giving artists the creative freedom to build characters that couldn’t exist in the real world. For aspiring animators and VFX artists, understanding motion capture animation is becoming increasingly important. As the demand for high-quality digital content continues to grow, professionals who understand how motion capture fits into the production pipeline have a valuable advantage. At e-Drishyam, students are introduced to industry-relevant animation and VFX workflows through practical learning, helping them understand how technologies like motion capture contribute to modern visual storytelling. What Is Motion Capture Animation? Motion capture, often shortened to “mocap,” is the process of recording an actor’s physical movements and converting them into digital data. That data is then applied to a 3D character, allowing the character to move naturally while preserving the actor’s original performance. Rather than animating every movement manually, animators use the captured performance as the foundation. They can then refine, enhance, or stylise it depending on the project’s creative direction. Motion capture is widely used across: Feature films Television and OTT productions Video games Virtual reality experiences Commercial advertisements Animated films Live virtual productions It’s important to understand that motion capture doesn’t replace animation. Instead, it gives animators a realistic starting point to build on. How Does Motion Capture Work? One of the most common questions beginners ask is, How does motion capture work? While the technology behind it is sophisticated, the overall process follows a clear sequence. Step 1: The Actor Performs The performer wears a specialised suit fitted with reflective markers or built-in sensors placed at the shoulders, elbows, knees, hips, and wrists. For facial performances, additional tiny markers or specialised facial cameras capture subtle expressions like smiles, eyebrow movements, and eye motion. The actor performs exactly as they would on a traditional film set. Step 2: Cameras Track Every Movement Multiple high-speed cameras are positioned around the performance space. These cameras continuously record the location of every marker from different angles, allowing the system to calculate precise 3D movement in real time. This creates an accurate digital representation of the actor’s motion. Step 3: The Data Is Processed The captured marker information is cleaned to remove errors or missing data. This stage often includes: Correcting tracking issues Filling missing frames Smoothing movement Organising the performance Clean data is essential before moving to animation. Step 4: Applying Motion to a Digital Character The processed motion is transferred onto a digital skeleton, commonly called a rig. Once connected, the digital character performs exactly as the actor did during the recording session. At this stage, animators begin refining the performance. Step 5: Animation Refinement Here’s where things get interesting. Motion capture provides realistic movement, but animators are responsible for adding personality. They may exaggerate expressions, adjust timing, improve poses, or enhance dramatic moments to better suit the story. The final character becomes a collaboration between the actor’s performance and the animator’s creativity. Why Motion Capture Technology Has Become So Popular The growth of motion capture technology isn’t simply due to its impressiveness. It solves real production challenges while improving storytelling. Realistic Character Performances Human movement contains countless subtle details that are difficult to recreate manually. Motion capture preserves natural body language, making digital characters feel believable. Faster Production for Complex Scenes Animating hundreds of realistic movements by hand can take weeks. Motion capture records those performances much more quickly, allowing animation teams to focus on refinement rather than building everything from scratch. Better Collaboration Between Actors and Animators Actors contribute emotional performances. Animators enhance those performances for stylised worlds. Together, they create characters that audiences genuinely connect with. Consistency Across Large Productions Major films and games often involve hundreds of shots. Using motion capture helps maintain consistent movement across different scenes and production teams. Where Motion Capture Is Used Today Many people associate motion capture only with Hollywood films, but its applications are far broader. Today, motion capture technology is used in: Films Fantasy creatures, superheroes, digital doubles, and large-scale visual effects all benefit from motion capture. Video Games Game developers use motion capture to create realistic combat, sports movements, dialogue sequences, and cinematic cutscenes. Virtual Production Modern virtual production combines real-time game engines with motion capture, allowing filmmakers to visualise scenes while actors perform. Animation Studios Some animated productions use motion capture as a starting point, then add stylised animation to match the artistic vision. Medical and Sports Research Outside entertainment, motion capture helps analyse human movement for rehabilitation, sports performance, and biomechanics. Does Motion Capture Replace Traditional Animation? A common misconception is that motion capture has made traditional animation unnecessary. It hasn’t. In fact, skilled animators remain essential throughout the process. Motion capture captures movement. Animators improve it. They adjust: Character personality Facial expressions Timing Weight Exaggeration Secondary motion Stylisation What most people don’t realise is that many motion-captured performances still require extensive animation before they’re ready for the screen. Animation and motion capture work together rather than competing with each other. Skills Every Future Motion Capture Artist Should Develop If you’re interested in working with motion capture animation, technical software knowledge is only one part of the equation. Successful professionals also develop: Strong Observation Skills Understanding how people naturally move helps improve both captured and hand-animated performances. Knowledge of Human Anatomy Body mechanics influence believable animation. Knowing how joints, muscles, and weight distribution work makes every movement more convincing. Acting Fundamentals Many animators study acting principles because believable animation starts with believable performances. Animation Principles Even with motion capture, concepts like timing,

storyboarding for animation
Blog

What Is Storyboarding and Why Every Animator Needs to Master It

Great animation rarely begins inside animation software storyboarding for animation. It begins with a pencil, a few rough sketches, and a clear vision of how a story should unfold. Ask any experienced animator about the biggest mistake beginners make, and you’ll hear a familiar answer: they jump straight into animating. Without proper , scenes often feel disconnected, camera angles become confusing, and hours of work are spent fixing problems that could have been identified in the planning stage. Storyboarding isn’t just another step in the production pipeline. It’s where ideas take shape before they become moving visuals. At e-Drishyam, we’ve seen students transform their storytelling skills simply by understanding how to plan before they animate. It’s one of the reasons storyboarding remains a core skill across animation, filmmaking, gaming, advertising, and visual effects. If you’re serious about building a career in animation, mastering storyboarding is one of the smartest investments you can make. What Is Storyboarding? A storyboard is a visual sequence of sketches that maps out an animation or film before production begins. Think of it as a comic strip that shows how each scene will look, where the camera will be placed, how characters will move, and how the story progresses. Instead of creating finished artwork, storyboard panels focus on communicating ideas clearly. Every frame answers important questions: What is happening? Who is in the scene? Where is the camera positioned? How does the action move from one shot to the next? This planning process allows directors, animators, editors, and clients to understand the story before investing time in full-scale production. Why Storyboarding Matters in Animation Animation is one of the most time-intensive creative processes. Even a few seconds of polished animation can require days of work. That’s exactly why storyboarding for animation is so valuable. It Prevents Expensive Mistakes Imagine spending hours animating a sequence only to realise the camera angle doesn’t support the emotion or the scene transition feels awkward. A storyboard helps identify these issues early, when changes take minutes rather than days. It Improves Visual Storytelling Animation isn’t just about making characters move. It’s about guiding the audience’s attention. A well-planned storyboard helps determine: Which shot creates suspense When to use close-ups How to reveal important information How scenes flow naturally The better the storyboard, the stronger the storytelling. It Makes Team Collaboration Easier Professional animation involves multiple artists working together. Storyboard artists, animators, lighting artists, editors, sound designers, and directors all rely on storyboards as a common visual language. Without one, every department interprets the script differently. It Saves Production Time Planning may seem slower at first, but it dramatically speeds up production. Many professionals say that investing more time in storyboarding saves significantly more time during animation because fewer revisions are required later. How to Make a Storyboard for Animation One of the most common questions beginners ask is how to make a storyboard for animation. The good news is that you don’t need exceptional drawing skills to create an effective storyboard. Here’s a simple workflow. 1. Understand the Script Before drawing anything, read the script several times. Focus on: Main actions Character emotions Important dialogue Scene transitions Camera moments The goal is to understand the story rather than immediately illustrating it. 2. Break the Story into Individual Shots Every camera change usually becomes a new storyboard panel. For example: Wide establishing shot Character enters Close-up reaction Action sequence Final reveal Thinking in shots helps organise the visual flow. 3. Sketch the Main Frames Don’t worry about creating polished illustrations. Simple stick figures often work perfectly. The purpose is clarity, not artistic perfection. 4. Add Camera Directions Each panel should include notes such as: Camera movement Zoom Pan Tilt Character movement Dialogue Timing These notes help everyone involved understand the intended sequence. 5. Review the Story Flow Here’s where things get interesting. Many first-time storyboard artists discover pacing problems only after placing all their panels together. Review the entire sequence and ask yourself: Does the story flow naturally? Are transitions smooth? Is every shot necessary? Does the audience always know where to look? Small adjustments here can dramatically improve the final animation. Essential Storyboarding Techniques Every Animator Should Learn Good storyboard artists don’t simply draw scenes. They control how audiences experience a story. Here are some of the most important storyboarding techniques used by professionals. Composition Every frame should guide the viewer’s eye toward the most important element. Using composition effectively makes scenes feel intentional rather than cluttered. Camera Angles Different angles create different emotions. For example: Low angles create power High angles create vulnerability Close-ups build an emotional connection Wide shots establish location Choosing the right angle changes how audiences interpret the scene. Visual Continuity Characters should move consistently between shots. If someone exits from the right side of one frame, they shouldn’t suddenly appear from the opposite direction unless the story intentionally changes perspective. Maintaining continuity keeps viewers immersed. Clear Silhouettes Professional storyboard artists often simplify character poses so actions remain readable even without detailed artwork. If a viewer can understand a character’s action just from the silhouette, the pose is usually effective. Rhythm and Pacing Not every scene needs rapid cuts. Some moments benefit from slower pacing, while action sequences require faster transitions. Storyboards help establish this rhythm long before animation begins. Why Storyboarding Is a Career Skill, Not Just a Classroom Exercise Many students assume storyboarding is only useful during training. The reality is very different. Studios actively seek professionals who understand storytelling, the language of the camera, and cinematic thinking. Storyboard artists work across: Animated films Television OTT content Advertising Gaming Motion graphics Explainer videos Visual effects production Strong storyboard skills also make animators more valuable because they understand the “why” behind every movement, not just the software used to create it. Should You Consider a Storyboard Artist Course? Learning independently is certainly possible, but structured guidance often accelerates growth. A good storyboard artist course teaches far more than drawing. Students learn: Visual storytelling Shot planning

Best animation courses in Thane
Blog

Animation Portfolio Tips for Beginners

Most beginner animation portfolios get rejected in the first eight seconds. Not because the animator lacks talent, but because the reel opens with the weakest shot, drags on for four minutes, and never tells the recruiter what they’re actually good at. Studios don’t watch reels from start to finish. They skim, and they decide fast. That single fact changes everything about how you should be building your portfolio. It isn’t a diary of everything you’ve ever animated. It’s a pitch, tight, deliberate, and built to answer one question in under a minute: can this person do the job? In our experience guiding students through this process at e-Drishyam, the strongest portfolios rarely come from the most talented beginners. They come from the ones who understood how to present what they had. Why Your Portfolio Matters More Than Your Certificate Here’s an uncomfortable truth nobody tells beginners early enough: no recruiter at a studio will ask for your mark sheet before your reel. Your portfolio is the only proof that matters. It’s the difference between “I completed an animation course” and “here’s what I can actually do.” This is exactly why a serious animation course in Thane should treat portfolio-building as a core deliverable, not an afterthought tacked on in the final week. If a program isn’t pushing you toward a finished, presentable reel by the time you graduate, it’s not preparing you for the industry; it’s just teaching you software. What Studios Actually Look For in a Beginner Reel What most people don’t realise is that recruiters aren’t grading your reel on perfection. They’re looking for three things: control, intent, and consistency. Control, can you make a character move believably, with weight and timing that feel natural rather than mechanical? Intent: Does every shot exist for a reason, or is it filler to pad the runtime? Is consistency your weakest shot, dragging down your strongest one? A two-minute reel with one outstanding 15-second shot and three mediocre ones reads as inconsistent. A 45-second reel with three strong shots reads as someone who knows their own standard. Recruiters remember the second kind. Common Portfolio Mistakes Beginners Make Before we get into what works, here’s where things usually go wrong, because avoiding these mistakes does more for your reel than any single tip. Leading With Your Weakest Work Recruiters decide within seconds. Your first shot should be your best one, not a warm-up exercise you happened to finish first. Showing Quantity Instead of Range Ten walk cycles don’t show range; they show you practised one thing ten times. Range means demonstrating different skills: character animation, lighting, rigging awareness, a touch of compositing, not ten variations of the same exercise. No Story, Just Shots A bouncing ball or a basic rig test has its place in training, but a portfolio full of disconnected technical exercises doesn’t tell a story. Even a five-second shot should feel like it belongs to a world. Ignoring Sound and Timing Animation lives and dies on timing, and timing is much harder to judge without sound. A reel with no audio, music, or sound design cues often feels lifeless, even when the animation underneath is solid. Portfolio Tips That Actually Move the Needle Keep It Short, 60 to 90 Seconds This is the single most common piece of advice professional animators give, and beginners ignore it the most. A tight reel under 90 seconds respects the recruiter’s time and forces you to be ruthless about what’s actually good. Lead and Close With Your Strongest Shots Recruiters remember the first and last impressions most. Sandwich your weaker (but still solid) work in the middle. Document Your Process, Not Just the Result A short breakdown shot, wireframe, rig, or turntable shows recruiters you understand the pipeline, not just the final render. This matters more in 3D work, where technical understanding is often as important as artistic instinct. Tailor the Reel to the Role A reel aimed at a gaming studio should emphasise rigging and real-time assets. One aimed at VFX or film should lean into compositing and camera tracking. Sending the same generic reel everywhere is a missed opportunity most beginners don’t realise they’re making. Why Structured Training Builds Stronger Portfolios Than Solo Practice Self-taught animators often have skill; what they’re missing is feedback. Without a mentor pointing out that your timing is half a beat off, or that your strongest shot is buried third in the sequence, you simply don’t know what to fix. This is precisely the gap a structured animation course in Thane is designed to close. At e-Drishyam, portfolio development isn’t a side project; it’s built into the curriculum from modelling and rigging through lighting, compositing, and final showreel assembly. Students work across Maya, 3ds Max, Blender, and After Effects, with mentors reviewing work at every stage rather than only at the end. That kind of consistent, expert feedback is genuinely hard to replicate through self-learning. What to Look For in an Animation Institute in Thane If you’re comparing the best animation courses in Thane, the reel you walk away with should be a deciding factor, not just the software list. A few things worth checking before you enrol: Does the course end with a real, presentable showreel, or just scattered project files? Is there mentorship and feedback built into every stage, not just the final module? Does the curriculum cover the full pipeline- modelling, rigging, lighting, compositing- or just one slice of it? Is there genuine placement support connecting your portfolio to actual hiring studios? Programs that combine animation and graphic design courses in Thane, like e-Drishyam‘s broader curriculum, tend to produce more versatile portfolios and students who can animate a character and also design the surrounding brand or motion graphics for it, which is increasingly what smaller studios and agencies expect. For students who want the deepest version of this, our 3D animation courses in Thane with placement support take you from fundamentals to a full professional reel, while the Diploma in Animation in

Blog

Best Video Editing Software for Beginners and Professionals

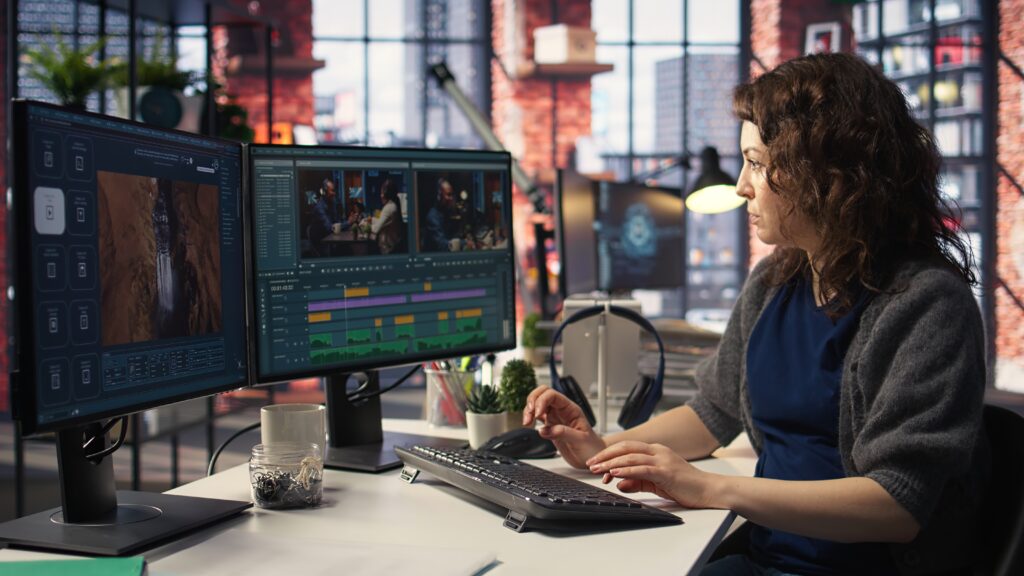
Open any film school WhatsApp group or YouTube comments section, and you’ll find the same debate looping endlessly: Premiere Pro or Final Cut Pro? DaVinci Resolve or After Effects? CapCut or “real” software? Newcomers treat this like a make-or-break decision. Working editors barely give it a second thought. That gap tells you something important. The software you pick matters far less than how well you understand what you’re doing with it. In our experience training students at e-Drishyam, the ones who struggle aren’t the ones using the “wrong” tool; they’re the ones who never learned the principles underneath the tool. So before we get into the software list, let’s reframe the question properly: not “what’s the best software,” but “what software actually supports the way professionals work, and how do you get good enough to use it well?” Why the Software Question Trips People Up Every editing tool, free or paid, beginner or professional, runs on the same core ideas: timeline management, cuts, transitions, audio sync, colour, and export settings. What changes between software is the interface, the speed, and how deep the toolkit goes for advanced work like compositing or colour grading. Here’s where things get interesting: most beginners who switch software every few months aren’t doing it because one tool is better. They’re doing it because they haven’t built real editing instincts yet, so every new interface feels like a fresh start. The software isn’t the bottleneck. The fundamentals are. That’s exactly the gap a structured video editing course in Thane is designed to close: not just teaching you buttons, but training your eye and workflow so any software feels intuitive. Best Video Editing Software for Beginners If you’re just starting out, you want software that’s forgiving, easy to learn, and respected enough that the habits you build will carry over later. Adobe Premiere Pro This is where most beginners should start, and for good reason. The interface mirrors how professional editors actually think, timeline-based, layered, with room to grow into colour grading and audio mixing as your skills develop. It’s also the software most Indian production houses, OTT platforms, and ad agencies run on, so what you learn here has direct market value. DaVinci Resolve Resolve has a free version that’s genuinely professional-grade, which makes it a brilliant low-cost entry point. It’s particularly strong for colour grading, a skill most beginners ignore for far too long, and one that quietly separates amateur footage from polished work. CapCut and Mobile Editors Useful for short-form content and building a feel for pacing, but treat these as a starting point, not a destination. They won’t prepare you for client work, broadcast deliverables, or studio pipelines. Best Video Editing Software for Professionals Once you move past the basics, the toolkit expands, not because beginner software is “bad,” but because professional work demands more layers of control. Adobe Premiere Pro (Still the Industry Backbone) Yes, it shows up twice on this list, and that’s deliberate. Premiere Pro scales from beginner to advanced without forcing you to relearn a new system, which is exactly why studios keep it as their default. Adobe After Effects What most people don’t realise is that editing and motion graphics are two different disciplines that professionals are expected to move between fluidly. After Effects handles compositing, VFX integration, and motion design in ways that pure editing software can’t. Final Cut Pro Favoured heavily in independent filmmaking and certain post-production houses for its speed on Mac-based pipelines. Worth knowing if you’re aiming at film or documentary work specifically. DaVinci Resolve (Professional Colour Suite) At the professional level, Resolve isn’t a beginner’s free tool anymore; it’s the industry standard for colour grading on major productions. Editors who can grade confidently are consistently more employable than those who can’t. Software Won’t Get You Hired. Workflow Will. Here’s an uncomfortable truth we share with every new batch: knowing which buttons to press in Premiere Pro doesn’t make you an editor. Studios don’t hire people who can operate software. They hire people who understand pacing, story structure, continuity, sound design, and how to take raw footage and shape it into something that actually communicates. This is precisely why self-taught editors often plateau. YouTube tutorials teach you software mechanics in isolation. They rarely teach you why a cut works, how rhythm affects emotion, or how to troubleshoot a sequence that “feels off” without being able to explain why. That kind of instinct only comes from structured practice, feedback, and exposure to real production workflows, which is exactly what a video editing course in Thane is built around. What a Structured Video Editing Course in Thane Actually Gives You At e-Drishyam, students don’t just sit through software tutorials. A video editing course in Thane with placement support is structured around the full production pipeline, from understanding cinematography and editing theory to colour correction, sound, and final delivery. Here’s what that looks like in practice: Multi-software fluency, training across Premiere Pro, After Effects, Final Cut Pro, and Photoshop, so you’re never limited to one studio’s preferred toolkit Editing theory, not just shortcuts, pacing, continuity, and rhythm, the things that actually separate good cuts from average ones Colour grading as a core skill, not an afterthought A real showreel by the end of the course, the single most important asset when you’re applying for editing roles Mock interviews and placement training, because knowing the software is only half the job; presenting your work professionally is the other half This is the real value of choosing a video editing course in Thane with placement support over piecing things together from scattered tutorials: you’re not just learning software; you’re being prepared for the actual hiring process. So, Which Software Should You Actually Learn? If we had to give a straight answer: start with Premiere Pro for its industry relevance and ease of entry, layer in DaVinci Resolve for colour, and build toward After Effects once your editing fundamentals are solid. But don’t let the software debate distract you

Blog

Step-by-Step Guide to Becoming a Game Animator in India

Most people who want to become game animators spend months watching YouTube tutorials, downloading free assets, and wondering why their work still doesn’t look like what they see in their favourite games. The gap isn’t effort. Its structure. Game animation is one of the most technically demanding and creatively rewarding career paths in the Indian media industry right now, and the demand is only accelerating. But getting there requires more than passion. It requires a deliberate, step-by-step approach. This guide lays that out clearly, from where you start to where you realistically land your first job. First, Understand What Game Animation Actually Is There’s a common misconception that game animation is the same as film animation, just on a smaller screen. It isn’t. Film animation is linear; you create a sequence, it plays, it ends. Game animation is real-time and reactive. Every movement a character makes needs to respond to player input, blend seamlessly with other animations, and run without breaking the game engine. This means a game animator doesn’t just make things move beautifully, they make things move logically, within technical constraints, inside an engine like Unity or Unreal. The craft involves understanding locomotion systems, blend trees, state machines, and the integration of animation with gameplay. That’s a different mindset than what most animation tutorials teach. Understanding this distinction early on is what separates students who get hired from those who build impressive-looking reels that don’t meet game studio requirements. Step 1: Build the Right Foundation, Learn Core Animation Principles Before touching any game-specific tools, your priority should be understanding the foundational principles of animation. The 12 principles, such as squash and stretch, anticipation, follow-through, overlapping action, and so on, aren’t outdated theory. They are the grammar of motion, and game studios look for them in every piece of work you submit. Spend dedicated time studying how real things move. Watch reference footage obsessively. Animate simple objects, a bouncing ball, a pendulum, a falling feather, until the principles are instinctive, not intellectual. What most people don’t realise at this stage is that this foundation is what makes everything else faster. Students who skip it and jump straight to character animation end up relearning the basics later, usually after a recruiter tells them their work looks “stiff.” Step 2: Master the Tools the Industry Uses Game animation in India and globally runs on a fairly consistent toolset. Knowing these isn’t optional; it’s the entry-level requirement for any studio conversation. Autodesk Maya, the industry standard for character animation, rigging, and skinning Blender, increasingly used in indie studios and as a learning tool; also relevant for modelling and rigging Adobe After Effects, essential for motion graphics and 2D animation elements in UI and cutscenes Unity / Unreal Engine, where your animations actually live; understanding how to import, set up blend trees, and implement animations inside an engine is non-negotiable Mixamo / Cascadeur, tools increasingly used for rapid prototyping and physics-based animation The best animation courses in Thane will expose you to most of these. When evaluating any programme, ask specifically which tools are covered and how deeply, not just which logos appear on a brochure. Step 3: Understand Rigging, Even If You’re “Just” an Animator This is where many aspiring game animators draw the wrong line. Many assume rigging is a separate department’s problem. In large AAA studios, that may be true. In Indian game studios, where teams are leaner and roles overlap, an animator who understands rigging is significantly more valuable than one who doesn’t. Rigging is the process of creating the internal skeleton and control system that makes a character move. A poorly rigged character creates cascading animation problems. If you understand how a rig is built, you animate more intelligently around its limitations and communicate better with the technical art team. At e-Drishyam, rigging is part of the 3D animation curriculum, not an optional add-on, because this is how the industry actually functions, not just how it’s described in job titles. Step 4: Learn Character Animation Specialised for Games Once your principles are solid and your tools are familiar, this is where the real game-specific learning begins. Game character animation focuses heavily on: Idle animations, characters at rest still need life; subtle breathing, weight shifts, micro-expressions Locomotion cycles, walk, run, crouch, sprint, cycles that loop seamlessly Combat and action states, attacks, dodges, hits, and deaths that read clearly and blend cleanly Facial animation, dialogue and emotion systems, especially relevant as Indian studios increase investment in narrative games Transition animations, the connective tissue between states, are often overlooked, but always noticed when missing The key discipline here is animating for readability at game speed. A beautiful animation that’s hard to read during fast gameplay is functionally useless. Game animators learn to exaggerate at the right moments, time their actions to feel impactful in fractions of a second, and cut unnecessary frames without losing quality. Step 5: Get Comfortable Inside a Game Engine This step is where many animation students stall, and it’s entirely avoidable. Learning animation in isolation, without understanding how it behaves inside Unity or Unreal, means you’re only halfway trained. Spend time understanding: How to set up an Animator Controller in Unity or an Animation Blueprint in Unreal How blend trees work for smooth locomotion transitions How root motion versus in-place animation affects character movement How to use State Machines to connect animation states logically You don’t need to become a game developer. You need enough engine literacy to implement and test your own work. Studios increasingly prefer animators who can hand off polished, engine-ready animations rather than raw files that need extensive technical art cleanup. Step 6: Build a Game-Specific Showreel Here’s something worth saying directly: a general animation reel will not get you into a game studio. Game studios look for showreels that demonstrate an understanding of game contexts, locomotion, combat, transitions, and, ideally, some in-engine implementation. A strong entry-level game animation reel includes: A clean, well-weighted locomotion cycle (walk and run at a minimum)

Blog

Portfolio Building Tips During a Master’s Diploma in Animation and VFX

Most students finishing their diploma in animation in Thane with placement make the same mistake: they treat portfolio building as something they’ll do after the course ends. By then, it’s too late to go back and redo work, rebuild scenes, or reshoot a render that was almost good enough. Your portfolio isn’t the finish line; it’s being built right now, one project at a time, whether you realise it or not. The animation industry doesn’t hire resumes. It hires showreels. When a studio HR opens your application, what they’re looking at within the first 30 seconds is your work, not your grades, not your certifications, not even which institute you attended. The quality of your portfolio is the single biggest factor in whether you get called for an interview. So if you’re currently enrolled in a Master Diploma in Animation and VFX (MDAV), or thinking about it, here’s how to make the most of those 18 to 24 months and come out the other side with a portfolio that actually gets you placed. Start Thinking Like a Studio from Day One  One of the things we emphasise at e-Drishyam, right from the first module, is this: you are not a student doing assignments. You are a junior professional building work samples. That shift in mindset changes everything: how seriously you approach a brief, how much time you spend on polish, and how often you push past “good enough.” Studios don’t care how challenging a project was. They care what it looks like when it’s done. A technically simple piece that’s been executed with care and attention to detail will always outperform a complex scene that looks rushed. So from week one of your animation course, start asking yourself: would I be proud to show this to a creative director at Technicolour or Prime Focus? If the honest answer is no, revise it before you move on. The 5 Portfolio Pieces Every MDAV Student Should Build  A strong animation and VFX portfolio isn’t about having 20 pieces. It’s about having 5 to 7 exceptional ones. Here’s what those pieces should ideally cover: A Character Animation Shot This is the bread and butter of most animation hiring. Pick a character, bipedal, expressive, and animate a 5 to 10-second performance that shows weight, follow-through, anticipation, and emotion. Recruiters at character animation studios will often judge your entire reel on this one clip. Spend more time here than anywhere else. A Lighting & Rendering Scene A well-lit, photorealistic interior or product render signals to a studio that you understand how light behaves in the real world and how to replicate it in Cinema 4D, Blender, or Maya using tools like Redshift. This is often underestimated by students, but lighting artists are consistently among the most in-demand roles in studios. A VFX Composite Shoot a simple plate on your phone, then composite a VFX element into it: fire, smoke, a CG object, or a screen replacement. It demonstrates your understanding of both the technical pipeline and real-world integration. Even a 10-second shot, done well, shows that you can work with a studio for live-action footage. A Motion Graphics Piece Pick a brand, real or invented, and create a 15 to 20-second motion graphics opener or product promo in After Effects. This one piece opens doors in advertising, digital content, and corporate production, three of the most accessible markets for fresh graduates. A Showreel (Your Compiled Highlight Reel) This is the masterpiece that ties everything together: a 60- to 90-second edit of your best work, cut to a track that matches the energy of your work. This is what gets emailed. This is what gets watched. Every second in it needs to earn its place. No filler, no padding, no weak shots added just for length. How to Build Portfolio Work During Your Course (Not After)  Here’s what most students don’t take advantage of: your MDAV program is 18 to 24 months of structured access to software, labs, faculty feedback, and real briefs. That is genuinely rare. Most self-taught animators spend years piecing together that kind of environment. Every class project is a potential portfolio piece if you treat it that way. Every brief your faculty gives you is an opportunity to go one step further than what’s asked. When a module is finished, don’t archive the file and forget it. Revisit it. Polish it. Render a better version. Replace the lighting. Refine the timing. “The gap between a student portfolio and a professional one isn’t talent. It’s usually just the willingness to push one more hour of refinement into a piece.” In our experience mentoring students through the MDAV at e-Drishyam, the ones who build the strongest portfolios are never the most naturally gifted. They’re the most consistently committed, the ones who stay back after class, who ask for critique, who do the extra version no one asked for. Common Portfolio Mistakes That Cost Students Placements  We’ve sat in on enough industry presentations and mock interviews to know the patterns that hurt students during placements. Here’s what to avoid: Do This Show only your best 5–7 pieces Lead your reel with your strongest shot Include a breakdown of your VFX work Label tools and software used per piece Keep your reel under 90 seconds Get faculty critique before submitting Avoid This Padding the reel with weak or unfinished work Opening with a slow or generic piece Including every project just to look “busy” Using the same reel for every job application Ignoring presentation, bad audio or poor editing kills a reel Waiting until the last month of the course to start  What most people don’t realise is that studios, especially at the entry level, aren’t expecting perfection. What they’re looking for is potential, attention to detail, and evidence that you understand production standards. A focused, clean portfolio of five strong pieces beats a bloated one of fifteen average ones every time. Use Your Institute’s Network, It’s Part of What You’re Paying For  One of

Blog

Is an Animation course Worth It in 2026? Career Scope & Salary Insights

Every year, we meet students who’ve been told some version of the same thing: “Animation is a hobby, not a career.” Meanwhile, those same students go on to be placed at Technicolour, Viacom18, and T-Series, drawing salaries that would make most engineering graduates rethink their choices. The animation industry in India isn’t a gamble. It’s a growing sector, and 2026 might just be the best time to enter it.  Let’s be straight about something. The question of whether an animation course is “worth it” isn’t really about the course; it’s about what you do with the skills it gives you. And to answer that honestly, you need a clear picture of where the industry is headed, what the salaries actually look like, and what separates the animators who thrive from those who stall. Here’s the full picture. The Animation Industry in India: Bigger Than Most People Think  India’s media and entertainment sector has been growing at a remarkable pace, and animation is right at its centre. OTT platforms like Netflix, Disney+ Hotstar, and Amazon Prime are pumping out content at a rate that studios can barely keep up with. Gaming, ed-tech, advertising, and architectural visualisation have all begun to demand animation talent that wasn’t needed a decade ago. What most people don’t realise is that Mumbai and the surrounding region, including Thane, sit at the epicentre of this boom. Some of India’s largest animation and VFX studios operate within commuting distance of where you’re reading this. The demand for trained professionals is real, consistent, and expanding. Industry Snapshot 2026 India’s animation and VFX industry is projected to cross ₹1,50,000 crore by 2027. Global studios are increasingly outsourcing animation work to India, making trained Indian animators more valuable than ever , not just locally, but internationally. What’s also changing is the type of work. It’s no longer just feature films and TV serials. The scope of animation now spans game cinematics, motion graphics for digital ads, product animations for e-commerce, explainer videos for startups, and virtual production sets for Bollywood. The more places animation shows up, the more jobs it creates. Where Can Animation Skills Actually Take You?  One of the biggest misconceptions about pursuing the best animation courses in Thane, or anywhere in India, is that you’re locking yourself into one job title. That couldn’t be further from the truth. Animation training builds a versatile skill set that opens doors across multiple industries. Film & OTT Feature films, web series, animated shows, the demand for character animators and VFX compositors here is enormous. Gaming India’s gaming industry is exploding. 3D modellers, riggers, and game animators are among the most sought-after profiles right now. Digital Advertising Brands need motion graphics, product renders, and animated social content, non-stop. This is one of the fastest-paying entry paths. Architecture & Real Estate 3D walkthroughs and property visualisations are a booming freelance niche for animation graduates. Ed-Tech & Corporate Every major e-learning platform needs animated explainers. Steady work is great for those who prefer structure over chaos. Freelance & Entrepreneurship Build a client base, work remotely, set your own rates. Plenty of our alumni do exactly this and earn well doing it.  Here’s where things get interesting: most of these paths don’t require you to relocate to a metro. Studios are hiring remotely. Freelancing is viable from day one. And being trained at one of the better animation institutes in Thane means you’re already in one of India’s primary media markets. What Does an Animation Career Actually Pay in 2026?  Let’s talk numbers, because this is where a lot of the doubt lives. Parents worry. Students second-guess themselves. The assumption is that creative careers don’t pay well in India. In animation, that assumption is outdated. In our experience mentoring students at e-Drishyam, salary outcomes are closely tied to three things: the quality of your portfolio, the tools you know, and the depth of your specialisation. Here’s a realistic breakdown: Experience Level Role Examples Salary Range (India) Entry Junior Animator, Rigging Assistant, Motion Designer ₹2.5 – ₹4.5 LPA Mid-Level Character Animator, 3D Generalist, VFX Compositor ₹5 – ₹9 LPA Senior Lead Animator, CG Supervisor, Art Director ₹12 – ₹25+ LPA Specialist/Freelance VFX Artist, Motion Graphics Expert, Studio Owner ₹20 LPA+ / Project-based What the table doesn’t capture is the trajectory. Entry-level salaries in animation grow faster than in many traditional fields because skills in this industry are tangible and demonstrable. A strong showreel speaks louder than a degree certificate. Animators who keep learning, adding tools like Cinema 4D, Blender, or Unreal Engine to their arsenal, consistently command higher packages, often within 2–3 years of starting out. “The animators who grow fastest aren’t the ones who waited for the perfect opportunity; they were the ones who built the perfect portfolio while they waited.” Why the Right Animation Institute in Thane Changes Everything  There are many places to learn animation. YouTube tutorials, online courses, and self-study all of it has value. But here’s what experience has taught us: what separates a professional animator from a hobbyist isn’t just knowledge, it’s structured exposure, feedback, and industry connections. Choosing the right animation course in Thane matters because of what happens around the curriculum, not just inside it. At e-Drishyam, students don’t just learn Maya or After Effects; they work on real briefs, get feedback from working professionals, attend industry seminars, and graduate with a portfolio that’s already been stress-tested. What to Look for When Choosing an Animation Course  If you’re evaluating your options, here’s what actually matters beyond the brochure: Industry-standard software coverage. The market doesn’t care which tools you prefer; it cares which tools it uses. Look for courses that teach Cinema 4D, Blender, Maya, After Effects, and Premiere Pro. These aren’t optional extras; they’re the baseline. Faculty with real production experience. Theory taught by theorists will only take you so far. Instructors who have worked on actual productions bring pipeline knowledge, real-world shortcuts, and genuine critique, the kind you won’t find in any textbook. Portfolio-focused training. Your

Blog

Career Opportunities After Completing a Course from an Animation Institute

Someone asked one of our students recently, right after he finished his 3D animation course, “So what exactly are you going to do with that?”  He didn’t have a clean answer at the moment. He just knew he loved the craft. He knew something was clicking for him inside that studio.  Six months later, he was working at a VFX house in Andheri, doing character work on a web series for an OTT platform. We’ve seen this story repeat more times than we can count. And yet, the question never goes away: What do you actually do with an animation course? Parents ask it. Friends ask it. Sometimes students ask themselves at 11 pm when self-doubt sneaks in.  So let’s answer it properly. Not with a brochure, but honestly. The Industry Isn’t Waiting, It’s Already Hiring  Here’s something most people outside the media world don’t fully grasp: the demand for trained animation and VFX professionals in India right now is genuinely outpacing the supply of good talent. OTT platforms are producing content at a pace nobody predicted five years ago. Every ad agency needs motion. Every gaming studio needs environment artists. Every startup with any ambition needs a designer who knows what they’re doing. And Bollywood, well, it never really stopped needing VFX talent; it just started needing a lot more of it.  The gap isn’t in opportunity. It’s in people who are trained well enough to walk into a studio and contribute from day one. That’s exactly what proper animation courses in Thane and Mumbai are built to do. What You Can Actually Become  3D Animator  This is the role people picture first, and for good reason, it’s the heart of the craft. 3D animators work across films, OTT series, commercials, game cutscenes, and architectural visualisations. The work involves rigging, physics, character movement, lighting, and all inside tools like Cinema 4D, Blender, or Maya.  It’s also one of those roles where your reel does the talking. A strong portfolio built during your course can open doors faster than a degree certificate ever could.  VFX Artist and Compositor  This is where things get genuinely exciting. VFX artists build the parts of a film or ad that couldn’t be captured on camera, the explosions, the environments, the seamless blending of actors into worlds that don’t exist. Compositing is the art of making it all look like it belongs together.  Mumbai has serious VFX infrastructure, studios like Technicolour and Prime Focus are here, and they hire continuously. If you know Nuke, After Effects, and DaVinci Resolve at a working level, you’re already speaking their language.  Motion Graphics Designer  Here’s the career path that surprises students the most once they’re in it. Motion graphics, animated titles, brand videos, explainer content, and UI animations are everywhere. Every content creator, every brand, every marketing team needs it.  And the freelance market for motion designers? It’s one of the most genuinely sustainable independent income paths in the creative industry right now. Students who master this often end up doing both studio work and their own clients within a couple of years.  Video Editor  Editing is one of those skills people constantly underestimate until they actually learn it. Every piece of video content you’ve ever watched, every film, every reel, every documentary, was shaped by an editor making hundreds of invisible decisions.  The range of work is enormous: feature films, web series, corporate content, YouTube, weddings, and documentaries. Editors who understand colour grading, sound design, and storytelling rhythm don’t struggle to find work. They struggle to say no to all of it.  Graphic Designer  Graphic design is the foundation that underpins almost every visual medium, and the demand for skilled designers is simply not going away. Branding agencies, e-commerce companies, advertising firms, media houses, they all need designers who understand not just the tools, but why a design actually works.  What good animation courses in Mumbai teach you isn’t just Photoshop and Illustrator. It’s visual thinking. That’s the part that makes you valuable.  Game Artist  India’s gaming industry has had a quiet but significant rise. Mobile gaming, PC games, VR experiences, all of it needs artists who can build the visual world players inhabit. Character design, environment art, and texture work are real, paid roles at studios across Pune, Hyderabad, and Bengaluru, with a healthy pipeline of graduates from the Mumbai region making that move.  Freelance Creative Professional  Not everyone wants a studio job. That’s completely valid, and the freelance economy for animation and design talent has matured enough to support it. Platforms like Upwork and Fiverr, combined with a strong Instagram presence and direct client relationships, have allowed trained animators and designers to build serious independent practices.  The one condition is that your portfolio has to be strong enough to justify real rates. That comes from real training. The Honest Truth About Who Gets Hired  We see many student portfolios on e-Drishyam. We also hear a lot of feedback from the studios where our students end up working.  The ones who get hired fastest aren’t always the most naturally talented. They’re the ones who are ready. Studios don’t have time to teach you the basics; they need someone who can open Cinema 4D on day one and actually get something done.  That readiness comes from the tools you trained on, the projects you worked on during your course, and whether the people who taught you were actually working professionals or just instructors reciting a syllabus.  This is why choosing the right institute matters more than most students realise when they’re first comparing options. Why Thane Makes More Sense Than People Think  There’s a perception that if you want the best animation courses in Mumbai, you need to be in the thick of South Mumbai or Bandra. In our experience, that’s not quite right.  Thane sits at the edge of the entire MMR creative ecosystem. The studios in Andheri, Goregaon, Powai, and beyond are all accessible. The industry connections are the same. But the environment is

Blog

Top Skills You Will Learn in a Professional Video Editing Course in 2026

Most people who want to learn video editing start the same way. They open YouTube, search “how to edit videos,” and spend the next few weeks jumping between tutorials. They learn shortcuts. They learn where to find effects. They learn how to export a file. And then they wonder why their work still doesn’t look professional.  The problem isn’t effort. It’s what YouTube teaches you how to use tools. It doesn’t teach you how to think like an editor. That distinction between operating software and actually editing is exactly what separates someone who takes the craft seriously from someone who watched a hundred videos and still can’t deliver consistent work.  A professional video editing course doesn’t just teach you more tools. It rewires how you see footage. It teaches you rhythm, restraint, storytelling, and technical discipline in a structured sequence that builds one skill upon another. Here’s what that actually looks like in 2026. Storytelling Through the Timeline  This is where everything begins. And honestly, it’s where most self-taught editors are weakest.  Editing is not assembly. It’s not taking all your clips and putting them in order. It’s deciding, shot by shot, second by second, what the viewer needs to feel right now.  That’s a storytelling decision. Not a technical one.  In a good video editing course, you learn to ask the right questions before you touch the timeline. What’s the emotional arc of this piece? Where should tension build? Where does the audience need to breathe? Which moment is the real climax, and are you actually giving it space to land?  We have seen students arrive with clean footage and good cameras, yet still produce flat, forgettable videos because they never learned to edit with intent.  Once you develop this instinct, everything else becomes a tool in service of the story. Not the other way around. Non-Linear Editing Workflow  This is the technical foundation every serious editor needs. Non-linear editing, working with tools like Adobe Premiere Pro, DaVinci Resolve, or Final Cut Pro, means you can access and rearrange any clip at any point without destroying the rest. Sounds simple. In practice, it’s a discipline.  The best course for video editing doesn’t just show you where the buttons are. It teaches you how to organise a project properly before you start, how to build a workflow that holds up when a client sends you ten additional clips at the last minute, and how to manage timelines that don’t become a cluttered mess by day three.  These are professional habits. And they’re genuinely difficult to build on your own without structure and feedback. Colour Correction and Colour Grading  Two skills. Both critical. Often confused.  Colour correction is fixing what’s technically wrong, exposure, white balance, skin tones, and consistency across shots. It’s not creative. It’s clinical. You’re asking: Does this footage look like it was shot in the same world?  Colour grading is what comes after. That’s where you make intentional decisions about mood, tone, and visual identity. That’s where your footage starts to feel like it belongs to a specific piece of work.  The rule we repeat constantly: never grade broken footage. A warm LUT applied to underexposed, inconsistent clips doesn’t create atmosphere. It creates a mess.  A professional video editing course teaches you to see colour accurately before you start using it creatively. That’s a skill that takes real time to develop, and real feedback to calibrate. Audio Editing and Sound Design  Here is something that gets said often because it keeps being true.  Viewers will forgive imperfect visuals. They will not forgive bad audio.  A crackly mic, a music track that’s three decibels too loud, a sudden jump in room tone between cuts, these pull the viewer out instantly. They don’t always know why the video feels wrong. They just feel it and stop watching.  Learning to edit audio properly is a non-negotiable part of the best video editing course. That means noise reduction, dialogue levelling, music automation, using room tone and silence as intentional tools, and understanding how sound and picture work together to create emotion.  This is not an afterthought. It’s half the experience. Pacing and Rhythm  Pacing is one of those skills that’s very easy to explain and very hard to master.  Shortcuts create urgency. Longer holds create weight. Equal clip lengths create monotony, even when the content is strong. Editors who understand rhythm don’t edit from habit. They edit from intention. They vary the pace of a sequence the way a good musician varies tempo , not randomly, but in service of what the moment needs.  In our experience, this is one of the last skills to click, but when it does, the quality of someone’s work improves dramatically and almost immediately. You can see it in their timelines. The cuts start to feel considered rather than automatic.  A structured video editing course in Thane or Mumbai builds this skill through practice, critique, and watching a lot of well-edited work with the right guidance on what to look for. Motion Graphics and Titles  Editing in 2026 doesn’t happen in isolation from design.  Every editor is expected to handle basic motion graphics, lower thirds, title sequences, text animations, and transitions in line with the visual identity. Clients don’t always have a separate motion designer on call. More often, the editor is expected to do it all.  This means understanding After Effects at a working level. Knowing how to build a clean lower third. Knowing when a simple fade is more effective than a complex kinetic title sequence.  The best video editing courses today include motion graphics as part of the curriculum , not as a bonus module, but as a core skill that working editors genuinely need. Multicam Editing  Live events, panel discussions, interviews, concerts, corporate shoots, and much professional video work involve footage from multiple cameras, all rolling simultaneously.  Multicam editing is a specific workflow skill: syncing footage, switching between angles, maintaining continuity, and making it all feel like a seamless, natural piece

Blog

Photoshop vs Canva: Which Tool Is Better for Professional Designers?

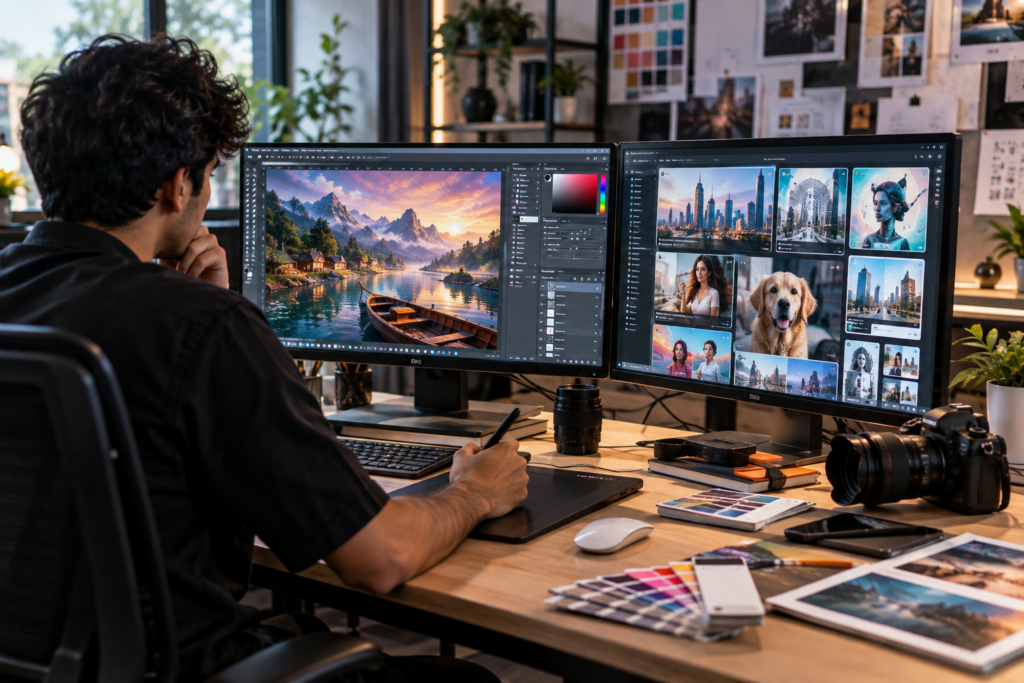
In today’s fast-paced digital world, design is everywhere on websites, social media, advertisements, apps, presentations, and even emails. With visuals playing such a powerful role in communication, designers need tools that are not only creative but also efficient, flexible, and professional. Two names dominate most design conversations today: Photoshop and Canva. The debate around Photoshop vs Canva has become especially relevant as more businesses, freelancers, and creators enter the design space. Canva has made design accessible to everyone, while Photoshop has long been considered the gold standard for professional designers. But the real question is: Which tool is better for professional designers? And more importantly, which one should you invest your time and skills in? At e-Drishyam, we believe the right tool depends on your goals, workflow, and creative depth. This comprehensive guide breaks down Photoshop vs. Canva from a professional designer’s perspective, covering features, flexibility, control, learning curve, industry usage, and real-world applications. Understanding the Two Giants: Photoshop and Canva Before comparing Photoshop and Canva, it’s important to understand what each tool is designed to do. What Is Photoshop? Adobe Photoshop is professional-grade image-editing and design software used across industries, including advertising, photography, filmmaking, UI/UX design, publishing, and digital art. It offers pixel-level control and unmatched creative flexibility. At e-Drishyam, Photoshop is taught as a core design skill because it underpins professional visual design thinking. What Is Canva? Canva is a cloud-based graphic design platform built for simplicity and speed. It allows users to create designs using pre-made templates with drag-and-drop tools. Canva is widely used by non-designers, marketers, small business owners, and social media managers. At e-Drishyam, Canva is often introduced as a productivity tool but not as a replacement for professional design software. Photoshop vs Canva: Core Purpose Comparison  Aspect Photoshop Canva Primary Purpose Professional image editing & design Quick, template-based design Target Users Designers, photographers, agencies Beginners, marketers, entrepreneurs Creative Control Extremely high Limited Learning Curve Steep Very easy This foundational difference shapes everything else in the Photoshop vs Canva debate. Creative Freedom and Design Control Photoshop: Complete Creative Authority Photoshop gives designers full control over: Layers and layer masks Advanced selections Brushes and textures Smart objects Color channels Blend modes Typography control Non-destructive editing Professional designers trained at e-Drishyam rely on Photoshop because it allows them to create from scratch not just customise templates. Canva: Fast but Restricted Canva offers: Ready-made templates Drag-and-drop elements Basic image adjustments Pre-set fonts and layouts While Canva is fast, it limits how deeply you can customise a design. You’re designing within a system, not building one. Verdict: In Photoshop vs Canva, Photoshop clearly wins for creative freedom. Professional Design Quality and Output  Photoshop for Industry-Level Work Photoshop supports: High-resolution print designs CMYK colour mode for printing Advanced export settings Precise typography alignment Professional retouching This makes it ideal for branding, advertising, packaging, posters, and photo manipulation. At e-Drishyam, students learn how Photoshop aligns with real-world production standards. Canva for Digital-Only Use Canva works best for: Social media posts Presentations Simple marketing graphics Internal business designs However, Canva lacks precision for professional print or complex brand systems. Verdict: Photoshop is the professional standard; Canva is convenience-focused. Learning Curve: Skill vs Speed Photoshop Learning Curve Photoshop requires: Understanding layers and masks Knowledge of design principles Practice with tools and shortcuts Time and patience At e-Drishyam, Photoshop is taught step by step through practical projects, ensuring learners don’t just know the tools but also the design logic behind them. Canva Learning Curve Canva can be learned in: A few hours Minimal design knowledge No technical background This ease is Canva’s biggest strength but also its biggest limitation for professional designers. Verdict: Canva is easier; Photoshop builds long-term professional skill. Branding and Customisation Photoshop: Built for Brand Identity Professional branding demands: Custom layouts Unique typography Controlled spacing and grids Color accuracy Photoshop allows designers to create unique brand assets that don’t look “template-based.” This is why e-Drishyam emphasises Photoshop for brand design training. Canva: Template Dependency Even with customisation, many Canva designs look similar. This can hurt brand originality and consistency especially for premium brands. Verdict: Photoshop wins for original branding and visual identity. Photoshop vs Canva for Different Design Use Cases Social Media Design Canva: Fast, easy, beginner-friendly Photoshop: More polished, custom visuals Photo Editing and Retouching Canva: Basic filters only Photoshop: Industry-grade retouching Advertising and Marketing Campaigns Canva: Good for quick internal visuals Photoshop: Essential for professional campaigns UI/UX and Digital Design Canva: Not suitable Photoshop: Industry-relevant At e-Drishyam, learners are guided on choosing the right tool based on project needs not convenience alone. Collaboration and Workflow Canva Collaboration Canva allows: Real-time collaboration Cloud-based editing Easy sharing This makes it useful for teams without design backgrounds. Photoshop Collaboration Photoshop integrates with: Adobe Creative Cloud Professional design pipelines Version-controlled workflows Professional studios and agencies prefer Photoshop-based workflows something emphasised at e-Drishyam. Cost and Accessibility Photoshop Pricing Photoshop operates on a subscription model, which reflects its professional capabilities. For serious designers, this is an investment in skill and career growth. Canva Pricing Canva offers a free version and a low-cost Pro plan, making it accessible for beginners and small teams. Verdict: Canva is budget-friendly; Photoshop is value-driven for professionals. Career Impact: What Do Employers Prefer? This is where Photoshop vs Canva becomes very clear. Most employers look for: Photoshop proficiency Advanced design skills Creative problem-solving Industry-standard workflows Canva skills are rarely listed as core requirements for professional design roles. At e-Drishyam, Photoshop training is aligned with real hiring expectations not shortcuts. Canva Is a Tool. Photoshop Is a Skill. One of the most important distinctions taught at e-Drishyam is this: Canva helps you create designs Photoshop helps you become a designer Canva depends on templates. Photoshop depends on your creativity. Can Professional Designers Use Both? Absolutely. Many professionals use: Photoshop for core design work Canva for quick client previews or social posts The mistake is thinking that Canva can replace Photoshop. It can’t. At e-Drishyam, students are taught Photoshop first, then Canva

Scroll to Top