Most Beginner Videos Don’t Fail on Camera — They Fail in the Timeline
Here’s an uncomfortable truth we’ve learned after reviewing hundreds of beginner projects at e-Drishyam:
Most videos don’t feel amateur because the footage is bad.
They feel amateur because the editing decisions are weak.
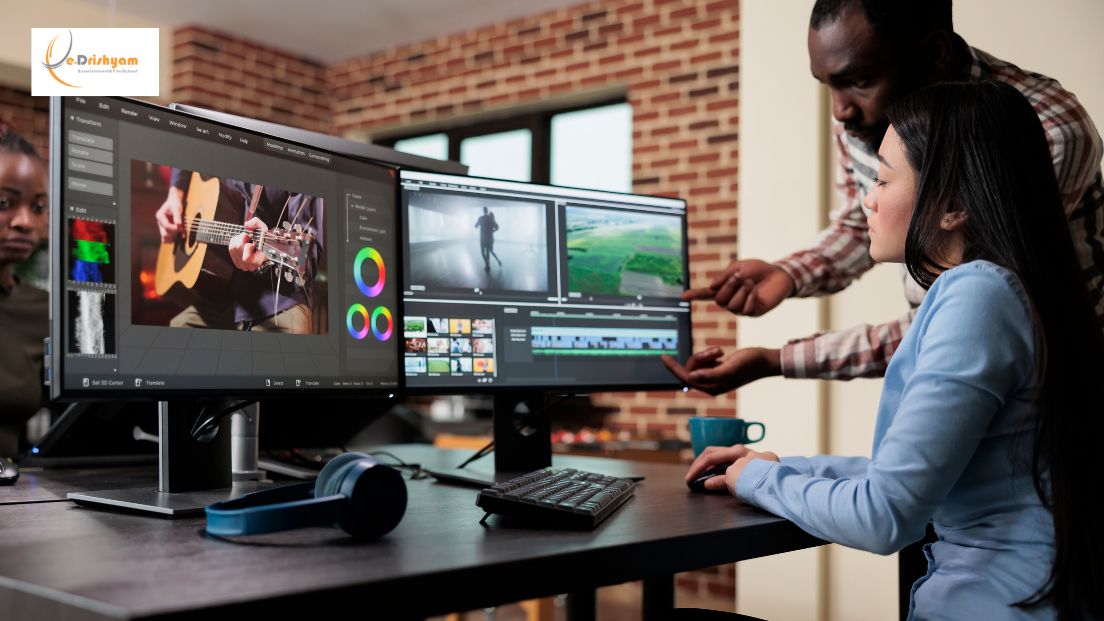
We regularly see students arrive with decent cameras, stable shots, clean lighting, and clear ideas. But once those clips hit the timeline, something collapses. The video drags. The message loses punch. The story doesn’t land the way it should.
In our experience, this happens for one reason: beginners learn software before learning to edit.
They memorise buttons, effects, and shortcuts, but never learn the video-editing techniques that govern rhythm, attention, and emotional flow. Editing isn’t decoration. It’s psychology. It’s deciding what the viewer feels, second by second—often without realising why.
This article breaks down five foundational techniques that consistently transform beginner edits into confident, watchable videos. These are the same principles we prioritise at e-Drishyam before students touch transitions, presets, or cinematic looks.
Master these, and everything else becomes easier. Ignore them, and no plugin will save your edit.
1. Cutting With Purpose: Editing Is Subtraction, Not Assembly
Beginners often think editing means “putting clips together.”
Professionals know editing is about removing what doesn’t belong.
Every cut is a decision. Not a technical one—but a storytelling one. The real question behind every cut is:
What does the viewer need right now to stay engaged?
When this question isn’t guiding the edit, we see predictable problems:
- Pauses that feel awkward rather than natural
- Information repeated in different shots
- Reaction shots that add nothing
- Clips kept because they look “nice,” not because they matter
At e-Drishyam, we push students to cut ruthlessly. Not emotionally. A clip can be beautifully shot and still be useless to the story.
Why This Matters
Attention is fragile. Viewers don’t consciously analyse why a video feels slow—they just leave. Purposeful cutting keeps momentum alive without the viewer noticing the edit itself.
Practical Editing Discipline
After creating your first rough cut:
- Watch the video without sound.
- If a shot feels slow or confusing visually, cut it.
- If you don’t miss it, your audience won’t either.
This single habit improves pacing more than most beginner tutorials combined.
2. Pacing: The Invisible Force Behind Viewer Retention
Pacing is one of the most underestimated video editing techniques, especially among beginners. Most assume pacing is about speed. It isn’t.
Pacing is about emphasis.
In our experience at e-Drishyam, pacing is what separates videos people finish from those they abandon halfway through.
How Pacing Actually Works
- Short shots increase urgency and energy.
- Longer shots signal importance or emotion.
- Rapid cuts build excitement or tension.
- Slower edits create space for understanding.
A major beginner mistake is treating every clip the same. Equal clip length creates a flat rhythm—even if the content is strong.
Why Beginners Struggle Here
They edit based on habit, not intent. Real editors vary pacing deliberately to guide how moments land emotionally.
Training Exercise We Use
Take one raw clip and create two edits:
- A fast-paced version using shorter cuts
- A slower version with longer holds
Watch both back-to-back. The emotional difference trains instinct faster than theory ever will.
3. J-Cuts and L-Cuts: Where Edits Stop Feeling “Choppy”
If there’s one technique that instantly upgrades beginner work, it’s this.
At e-Drishyam, J-cuts and L-cuts are often the turning point—when students finally understand why professional edits feel smooth without obvious transitions.
What Makes These Cuts Powerful
- They mirror real-life conversation flow.
- They reduce visual abruptness.
- They keep attention moving forward.
When audio overrules PS visuals naturally, the brain accepts the cut without resistance. That’s why films, interviews, and documentaries rely heavily on these techniques.
Beginner Misconception
Many beginners rely on transitions to hide bad cuts. In reality, clean audio flow often eliminates the need for transitions entirely.
If your cut needs a transition to feel smooth, something upstream is wrong.
4. Colour Correction First — Always
Colour is where beginners try to “look professional” and accidentally make things worse.
One of the strictest rules we enforce at e-Drishyam is this:
- Never style broken footage.
- Correction vs Grading (Why the Order Matters)
- Colour correction fixes exposure, white balance, and consistency.
- Colour grading adds mood or style.
Applying LUTs before correction exaggerates problems instead of hiding them.
What Actually Elevates Video Quality
- Matching brightness across shots
- Natural skin tones
- Balanced contrast with visible detail
If two clips from the same scene don’t visually belong together, viewers subconsciously disconnect—even if they can’t explain why.
Clean colour doesn’t draw attention to itself. That invisibility is what makes it effective.
5. Sound Editing: The Fastest Way to Lose or Earn Trust
Here’s a rule we repeat constantly at e-Drishyam:
Audio quality determines whether viewers trust your video.
You can survive imperfect visuals. You cannot survive an irritating sound.
Yet many beginners treat audio as an afterthought.
Essential Sound-Focused Video Editing Techniques
- Removing background noise
- Balancing dialogue levels
- Controlling music volume
- Using room tone and silence intentionally
- Practical Audio Benchmark
Dialogue should feel comfortable at normal volume without strain. If viewers need to adjust volume repeatedly, the edit has failed.
Common Beginner Error
Adding music because the scene “feels empty.” Silence, when used intentionally, often carries more emotional weight than background music.
An Insider Framework We Teach at e-Drishyam: The “Invisible Edit Test”
This is a simple test we use to evaluate beginner edits.
Ask yourself:
- Does anything feel distracting?
- Does any cut pull attention to itself?
- Does the viewer notice technique more than message?
- If yes, the edit needs refinement.
Good editing disappears. The viewer remembers the story—not the tools used to tell it.
When Beginners Should Not Do More
An important lesson we teach early at e-Drishyam:
- Over-editing is insecurity in disguise.
Avoid:
- Excessive transitions
- Random slow motion
- Overused effects
- Presets without understanding
Professional editors don’t ask, “What can I add?”
They ask, “What can I remove without losing impact?”
Why These Video Editing Techniques Work Together
Strong editing isn’t built from isolated tricks—it’s built from alignment.
When you:
- Cut with intent
- Control pacing deliberately
- Use J-cuts and L-cuts naturally.
- Fix colour before styling.
- Treat audio as half the experience.
Your edits stop feeling accidental. They feel controlled, confident, and intentional.
That’s why these five video editing techniques form the foundation of training at e-Drishyam. Once students master them, advanced tools stop feeling overwhelming—and start feeling optional.
Final Perspective: Skill Always Outlives Software
Editing software will evolve.
Trends will change.
Presets will become outdated.
But strong video editing techniques never lose relevance.
Every confident editor started with messy timelines and awkward cuts. The difference wasn’t talent—it was discipline guided by fundamentals.
If you want your videos to feel professional, stop chasing effects. Master these five techniques first. Everything else will fall into place naturally.